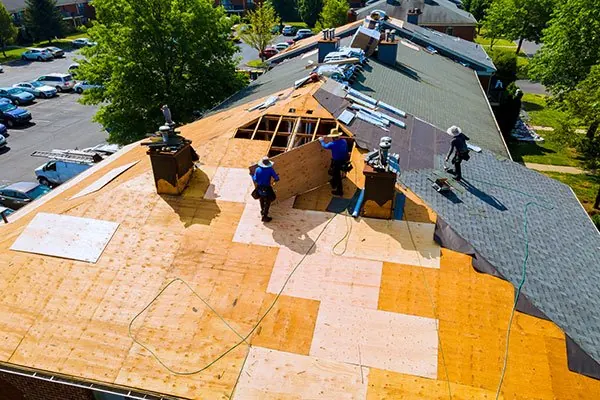
Every roof replacement in Adelaide follows roughly the same order of work, whether the new cover is concrete tile, terracotta or Colorbond steel. Knowing the stages helps you read a quote, understand why a crew is doing what it is doing on a given day, and spot when something has been skipped. This guide is for homeowners who want the technical sequence laid out plainly, from the first inspection to the last ridge cap.
If you want to know how it feels to live through the job, read what to expect during a roof replacement. This page sticks to the work itself.
Step 1: Inspection and scope
A contractor inspects the roof from the outside and, ideally, from inside the roof space. They look at the cover, ridges, valleys, flashings, gutters and the visible timber frame, and note anything unusual such as sagging lines, water stains on the ceiling side or material that might be asbestos cement.
The output should be a written scope: what is being removed, what is going back, which materials, which colour, what happens to gutters and downpipes, how solar panels are handled and how unforeseen work will be priced. A vague scope is the most common source of disputes later.
Step 2: Approvals and planning checks
Most like-for-like re-roofs in South Australia need no development approval. Heritage places and areas, a change to the roof shape or structural alterations may, and applications are lodged through the PlanSA portal under the Planning and Design Code. Check with your council before work starts. In the Adelaide Hills and parts of the foothills, bushfire hazard overlays can bring AS 3959 construction requirements that affect materials and detailing, so raise this early.
Step 3: Safety set-up
Before anyone strips a tile, the site is made safe. That usually means:
- Scaffold or guardrail along the eaves, and sometimes a full scaffold on two-storey homes.
- Safety mesh, harness anchors or other fall protection.
- A skip bin and a clear path for removing waste.
- Solar panels disconnected by an electrician, then removed and stored.
This stage is quick but non-negotiable. Fall protection on residential roofs is a workplace safety matter, and you should expect to see it.
Step 4: Stripping the old roof
The old cover comes off in sections. Tiles are lifted and lowered, steel sheets are unscrewed, and ridge capping, mortar bedding, old battens and failed sarking are removed. Good crews only strip as much as they can cover again the same day.
If any part of the roof might contain asbestos, that work stops. Removal is licensed work regulated by SafeWork SA, which sets out when a licensed removalist is needed, and disposal must go to an EPA-licensed facility. Never cut, drill, water-blast or walk on suspected asbestos sheet. See how to tell if your roof is asbestos.
Step 5: Frame inspection and repairs
With the cover off, the rafters, purlins, ridge board and supports are exposed. This is the moment hidden problems show up: rot from long-term leaks, termite damage, undersized timbers or a frame that has spread or dropped. On the Adelaide Plains, reactive clay soils move with the seasons, and decades of that movement can leave older homes with uneven roof lines.
Repairs might mean replacing individual timbers, adding struts or straightening a sagging section. Any change to the agreed scope should be shown to you with photos and priced before it is done.
Step 6: Sarking and insulation
Sarking is laid across the rafters, lapped and fixed, then tensioned so it drains to the gutter. For steel roofs, a foil-faced insulation blanket is often used instead. This is also the cheapest time to upgrade ceiling insulation, because access is easy. Our guide to insulating during a roof replacement covers the options.
Step 7: Battens
New battens are fixed across the rafters at spacings that suit the chosen cover. Tile battens sit closer together; steel roofs usually use battens or purlins further apart. Tie-down and fixing methods follow the relevant standards for your area's wind conditions.
Step 8: Laying the new cover
Tile roofs
Tiles are loaded onto the roof in stacks, then hung course by course from the eaves up, with clips or fixings as required. Valleys get metal valley irons, and cut tiles are fitted along hips and valleys. Ridge and hip caps are bedded and then pointed with a flexible compound.
Steel roofs
Sheets are lifted onto the roof, set square to the gutter line and screwed down in long runs. Cuts are kept to a minimum, and any steel swarf from cutting or drilling is brushed off the same day so it does not rust and stain the new surface.
| Detail | Tile roof | Steel roof |
|---|---|---|
| Underlay | Sarking | Sarking or insulation blanket |
| Batten spacing | Close | Wider |
| Fixing | Hung on battens, clipped | Screwed through the sheet |
| Ridges and hips | Bedded and pointed caps | Folded metal capping |
| Valleys | Metal valley iron | Metal valley gutter |
Step 9: Flashings, gutters and penetrations
Flashings seal every edge and junction: wall abutments, chimneys, vent pipes, skylights and barges. Gutters and downpipes are replaced or refitted and fall-tested. Solar mounting points are prepared and the panels reinstalled, followed by an electrician's reconnection.
Step 10: Clean-up and handover
The final step is easily rushed but matters. Gutters are flushed, the yard is swept for fixings and broken tile, scaffold and skip are removed and the finished roof is photographed. You should be offered a walk-through and paperwork covering the materials and any workmanship warranty the contractor provides.
Where shortcuts tend to creep in
Most of the stages above happen out of sight once the next layer goes on, which is why they are the easiest places to cut corners. A few to keep an eye on:
- Reusing tired flashings. Old lead or steel flashings that are cracked, rusted or poorly dressed are a common source of leaks on a brand new roof. Ask whether they are being replaced or reused, and why.
- Skipping the frame check. If the crew strips and re-covers in one motion without looking at the timbers, a sagging or rotten section can be locked in under the new cover.
- Loose or unlapped sarking. Sarking that is torn, sagging into the gutter line or not lapped properly lets water and dust through instead of draining it away.
- Poor ridge pointing on tile roofs. Pointing that is thin, cracked or applied over old, crumbling bedding will not last. On older Adelaide homes, seasonal movement from clay soils puts extra strain on ridges.
- Mixed metals and swarf. On steel roofs, incompatible metals in contact, or swarf left on the surface, can cause early corrosion. This matters more near the coast, where salt air speeds things up.
- Gutters as an afterthought. New gutters that do not fall properly to the downpipes will hold water and overflow in the first heavy winter rain.
None of this needs you on the roof. Asking for progress photos at the end of each stage, especially after stripping, after sarking and before ridges go on, gives you a record of the work that ends up hidden.
Reading a quote against these steps
When you compare quotes, check that each one covers every stage above. Missing sarking, unclear batten work, vague flashing details or no mention of solar or gutters are the usual gaps. Our guide to questions to ask a contractor turns these into a checklist, and the cost guide explains which steps tend to move the price. When you are ready to talk to someone, contact us.